Want to automate your work using Google Sheets? Whether you’re keeping track of leads, updating reports, managing inventory, or collecting form responses, connecting your self-hosted n8n to Google Sheets can help you save time and avoid repetitive tasks.
With n8n, you can create smart workflows that automatically read, write, or update your sheet data, no coding needed.
In this simple guide, we’ll walk you through how to connect Google Sheets to your self-hosted n8n setup, from setting up your API keys in Google Cloud to using your spreadsheet data inside n8n. Let’s get started and make your spreadsheets work smarter, not harder.
Step 1: Create a Google Cloud Project
To begin, you’ll need to access the Google Cloud Console (https://console.cloud.google.com/). This is where you’ll manage your API services.
Once you are in the console, click on the project dropdown in the top navigation bar. Then select “New Project” to create a new Google Cloud project. Give your project a name that reflects its purpose for example, “n8n Google Sheets Integration”. After creating the project, ensure it is selected as the active project. You’ll see confirmation in the top bar stating “Now viewing project \[project name]”.
Step 2: Enable the Google Sheets API
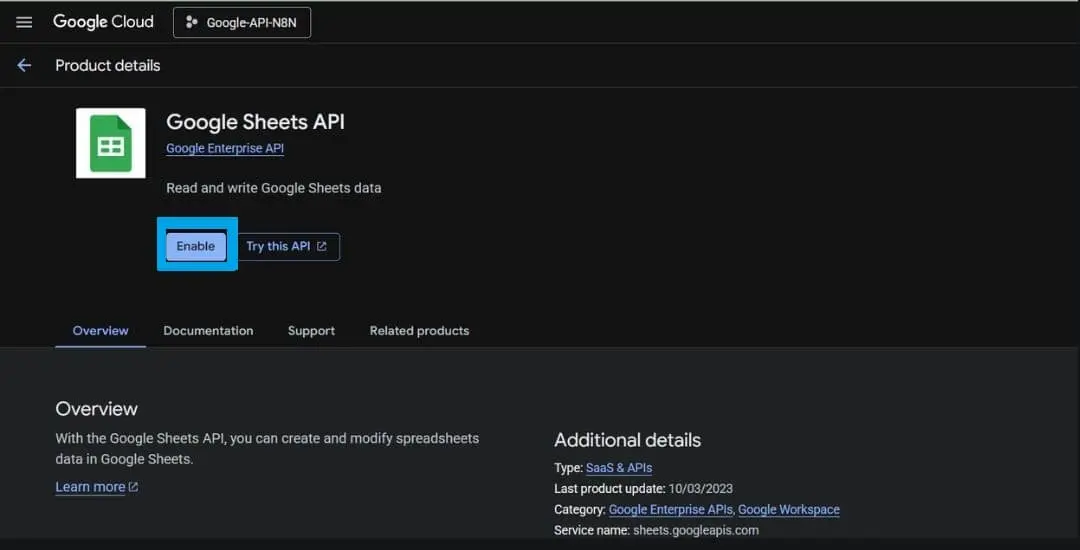
With your project selected, go to the API Library within the Cloud Console. Use the search bar to find “Google Sheets API.” Click on it to open the API details page, and then click “Enable” to activate the API for your project. This allows your n8n workflow to interact with Google Sheets via the API.
Step 3: Configure the OAuth Consent Screen
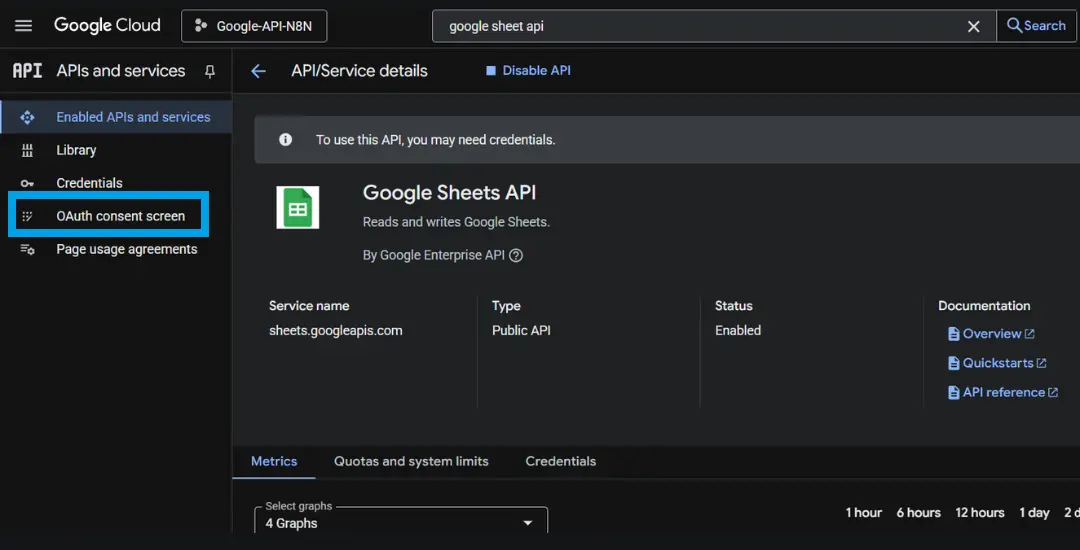
Before creating API, you need to configure the OAuth consent screen. This step defines what information users (in this case, yourself) will see when authenticating your application.
In the left-hand navigation menu, click on “OAuth Consent Screen.”
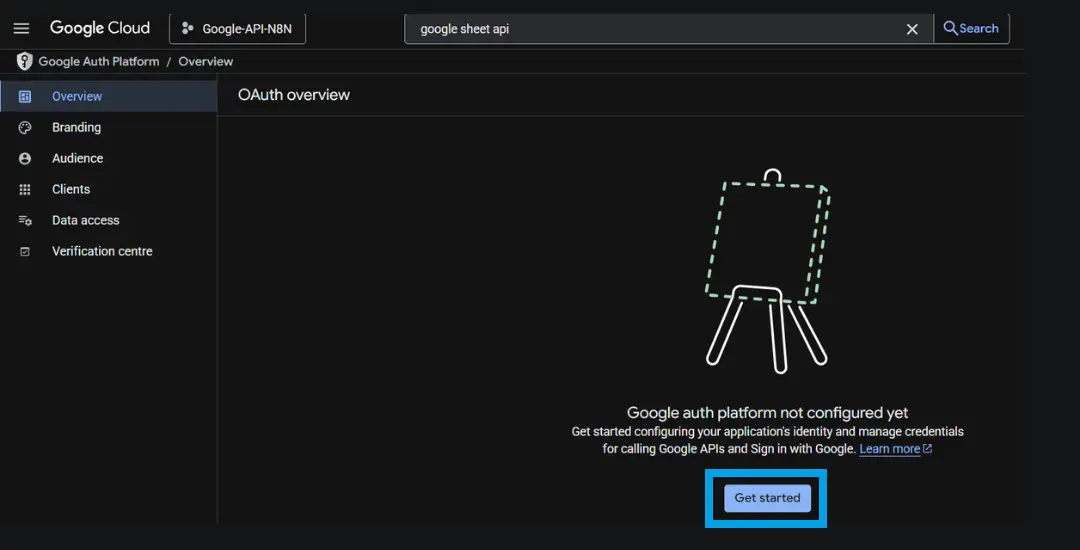
Choose “Get Started” to continue OAuth setup.
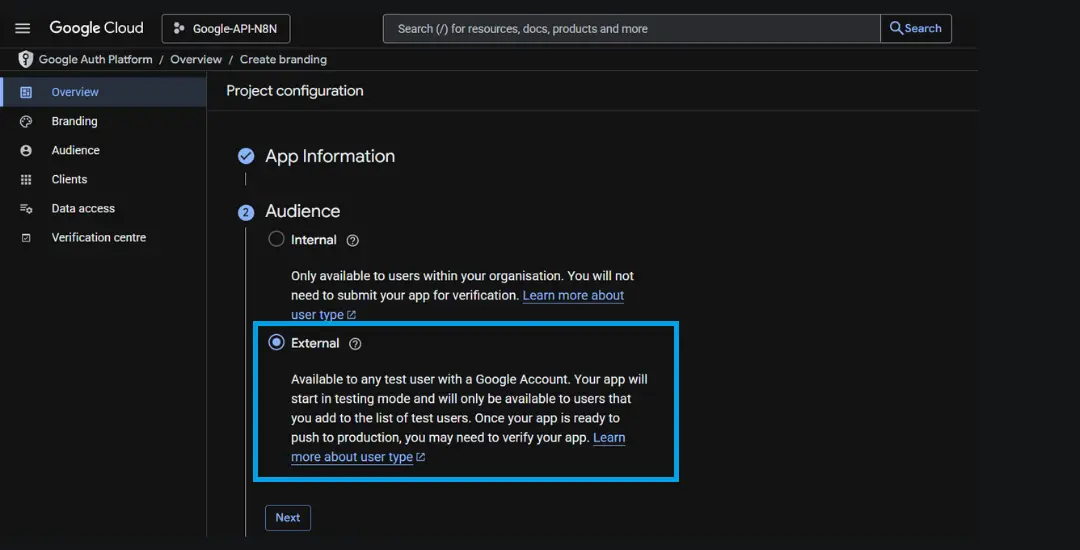
Fill in the required fields such as the App Name, User Support Email. Next – choose the “External” user type this is required for personal Google accounts and is suitable if you are only granting access to your own email.
Enter your email for “Contact Information” – “Next” – agree to terms and “Create”.
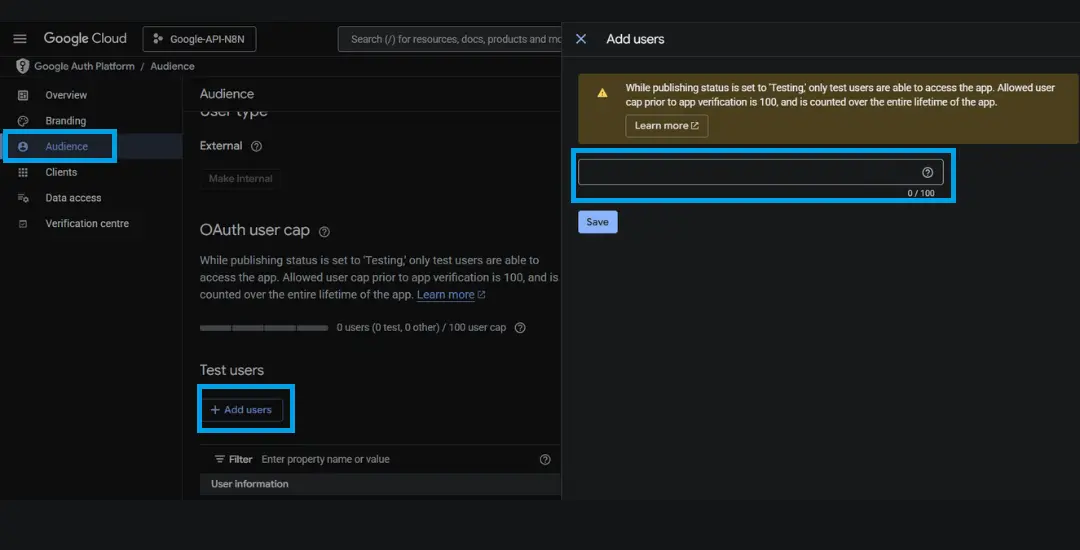
Navigate to “Audience”, in the “Test Users” section, add the Gmail address that you will use to authenticate with Google Sheets. This should be the account that owns or has access to the sheets you intend to connect to n8n.
In the “Data access” section, click “Add or Remove Scopes.” You can start with basic scopes such as `/auth/spreadsheets` which allow reading and writing to Google Sheets or select all.
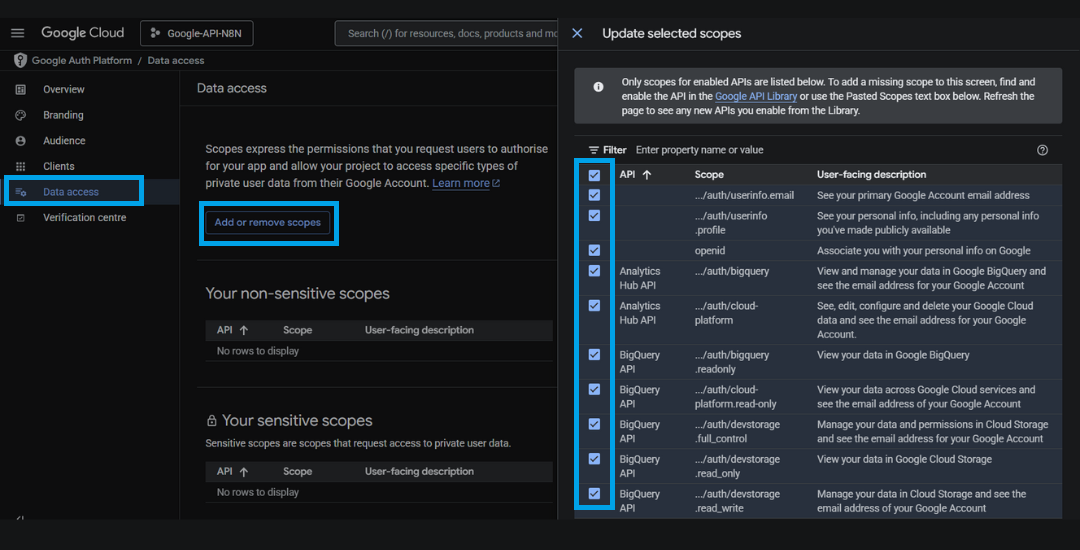
Once the scopes are selected, click “Update”. Click “Save and Continue” to finish setting up the consent screen.
Step 4: Create OAuth2 Credentials
Now that the API and consent screen are configured, it’s time to generate the credentials that n8n will use to connect to Google Sheets.
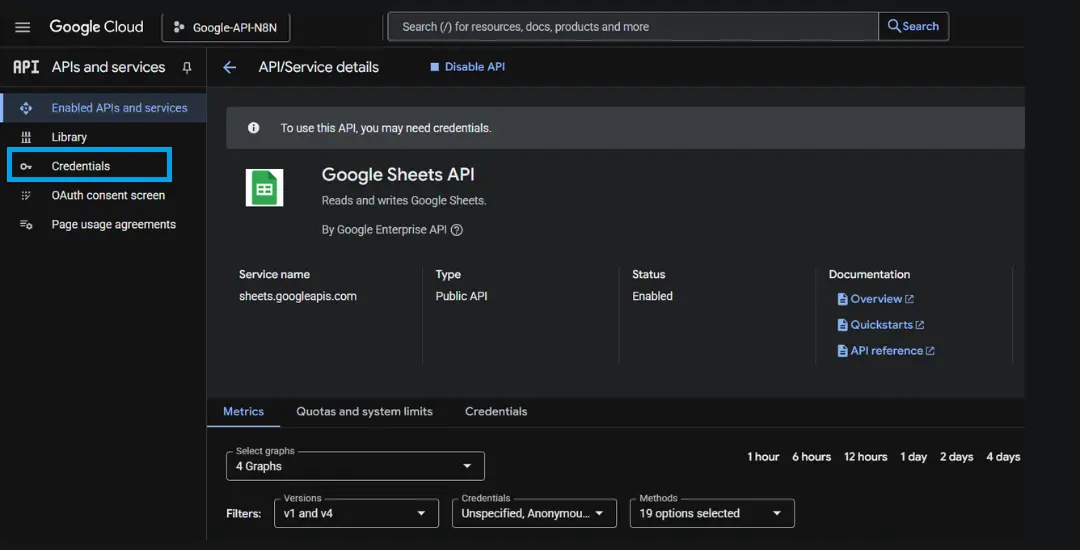
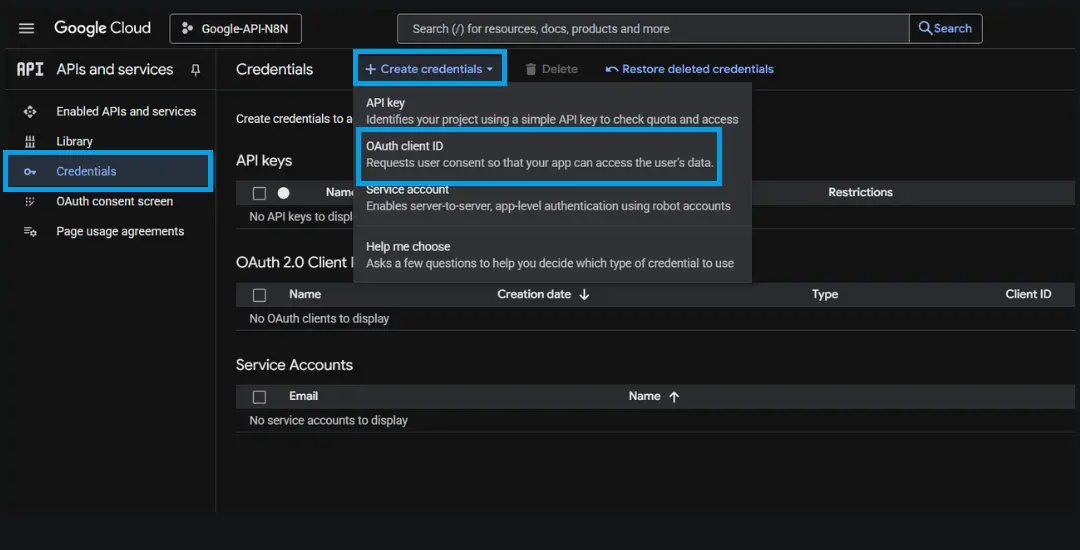
Use the search bar again to find “Google Sheets API.” Click on manage and navigate to the “Credentials” section in the Cloud Console.
Click “Create Credentials” and choose “OAuth client ID.”
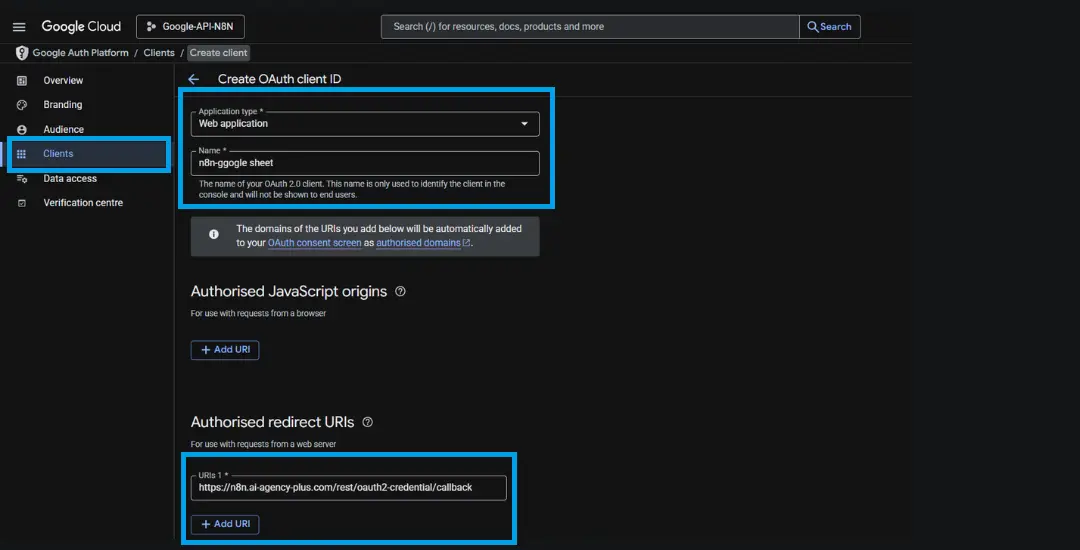
For the application type, select “Web Application.” Give the credential a name, such as “n8n Sheets OAuth.”
At this point, you will need to add the **OAuth redirect URL** from your n8n instance. To get this, go to your n8n instance, open the credentials section, and start creating a new credential of type “Google Sheets OAuth2.” The redirect URL will be displayed there copy it and paste it into the “Authorized redirect URIs” field in the Google Cloud form.
Once the URI is added, click “Create.” Google will now generate a **Client ID** and **Client Secret**.
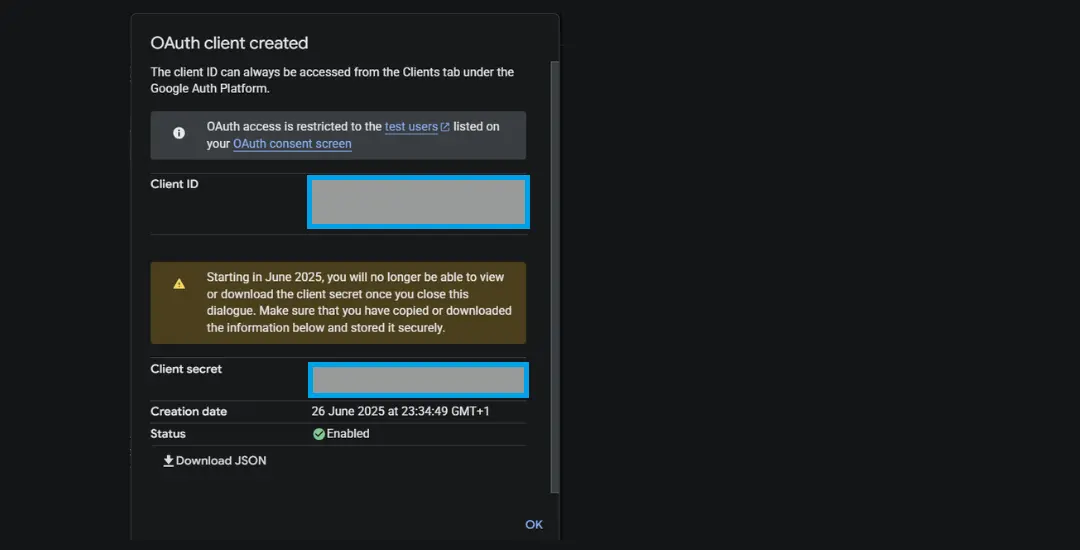
Save these two values securely, they are required in the next step to connect n8n with your Google account.
Step 5: Connect n8n to Google Sheets
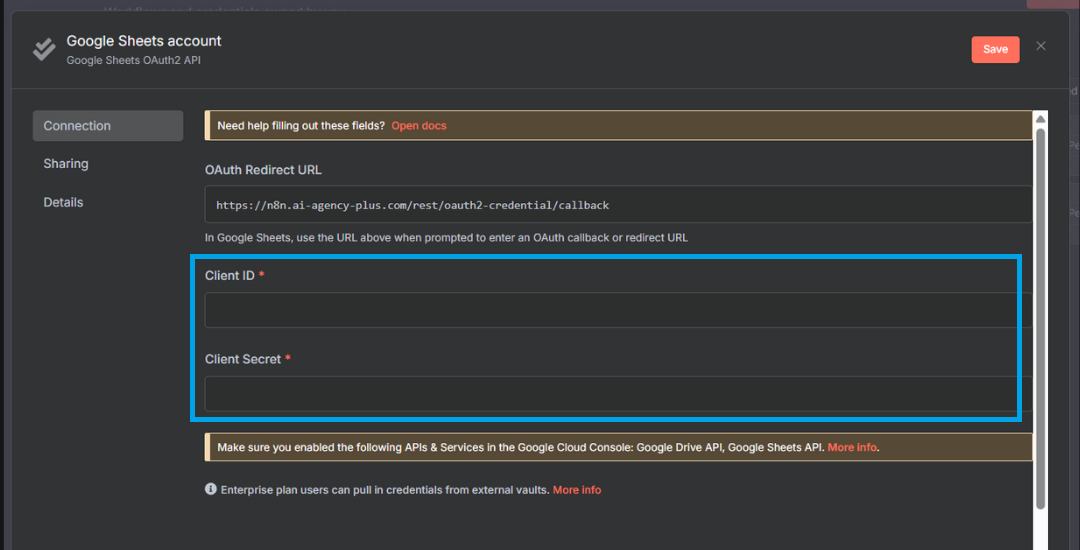
Go back to your n8n instance and navigate to the “Credentials” tab. Click “Create New” and select “Google Sheets OAuth2” as the credential type.
Paste the **Client ID** and **Client Secret** you just generated into the appropriate fields. Once both values are entered, click “Save” and then click “Connect” or “Sign in with Google.” A pop-up window will appear where you can choose the Google account you want to connect.
During this process, Google may display a warning saying the app is unverified. You can safely click “Continue” since this is an internal app you’re using for personal or organizational automation. Complete the authentication process and close the window.
If the authentication was successful, n8n will display a message confirming that the account is connected. You may need to refresh the page in n8n if you don’t see the change immediately. This is a known UI bug and doesn’t affect the functionality.
Step 6: Test the Google Sheets Integration with a Workflow
Once you are connected, you can test the integration by building a simple workflow.
Create a new workflow in n8n and start with a “Manual Trigger” node. Then, add a “Google Sheets” node and choose the operation “Create Spreadsheet.” Select the credential you just connected. Enter a name for the new spreadsheet something like “n8n Test Sheet” and execute the node.
If the setup was successful, n8n will create the Google Sheet in your Google Drive. You can verify this by checking your Drive for the newly created file.
You can expand on this workflow by adding data to the sheet, appending rows, or retrieving data as part of a larger automation process.
Common Issues and Troubleshooting
If your credentials don’t show as connected after authentication, try refreshing the browser or the credentials tab in n8n. This usually resolves display issues.
Make sure you are logged into the correct Google account when performing authentication, especially if you have multiple accounts active in your browser.
If you encounter errors about scopes or access, double-check the OAuth consent screen settings and verify that the correct scopes were granted.
Also, ensure that the redirect URI in Google Cloud Console matches exactly with what is shown in n8n any mismatch will cause the authentication to fail.
Connect n8n to Google Sheets and Unlock Seamless Automation
Integrating Google Sheets with n8n allows you to automate tasks that would otherwise require manual effort whether it’s logging form data, syncing information from APIs, or managing operational records.
By completing this setup, you’ve created a secure and scalable integration between your workflows and Google Sheets using OAuth2. You can now fully leverage the power of n8n to read, write, and update spreadsheet data automatically. This is just the foundation from here, you can build more complex automations, integrate additional services, and streamline your data workflows.
Found this helpful? Share it with others. Book a discovery call to explore how AI and automation can support your business growth.