
In this comprehensive guide I’ll walk you through how to self-host n8n on Azure free tier, giving you 12 months of completely free automation power with automatic HTTPS and SSL certificates.
By the end of this tutorial, you’ll have:
- A fully functional self hosted n8n instance running 24/7
- Free hosting for 12 months on Azure
- Automatic HTTPS with Let’s Encrypt SSL certificates
- Custom domain setup (e.g., n8n.yourdomain.com)
- Persistent data storage across updates
- Professional reverse proxy with Traefik
Cost: $0 for the first 12 months (Microsoft Azure Free Tier)
Prerequisites for Self Hosting n8n on Azure
Before we begin, make sure you have:
- A domain name (you can get one for ~$3/year from Namecheap, Porkbun, or Cloudflare)
- Access to your domain’s DNS settings (via your registrar or Cloudflare)
- A credit/debit card (required for Azure verification, but you won’t be charged)
- Basic command line knowledge (I’ll explain each command)
Step 1: Sign Up for Azure Free Account
Microsoft Azure offers an incredibly generous free tier that includes:
- $200 USD in credits for the first 30 days (we won’t be using these)
- 12 months of free services including a B1s VM
- 750 hours/month of compute time (enough for 24/7 operation)
- 15GB outbound bandwidth per month
Create Your Azure Account
- Go to https://azure.microsoft.com/en-gb/pricing/purchase-options/azure-account/
- Click “Try Azure for Free”
- Enter your details:
- Country
- Name
- Mobile number (for verification)
- Credit/debit card (for identity verification only)
- Complete the verification process
- Once verified, you’ll land on portal.azure.com — your Azure dashboard
Important: We’re using the 12-month free tier B1s VM, NOT the $200 credits. This means your setup will be completely free for a full year.
Step 2: Create Your Free Tier Virtual Machine
Now let’s create the VM that will host your n8n instance.
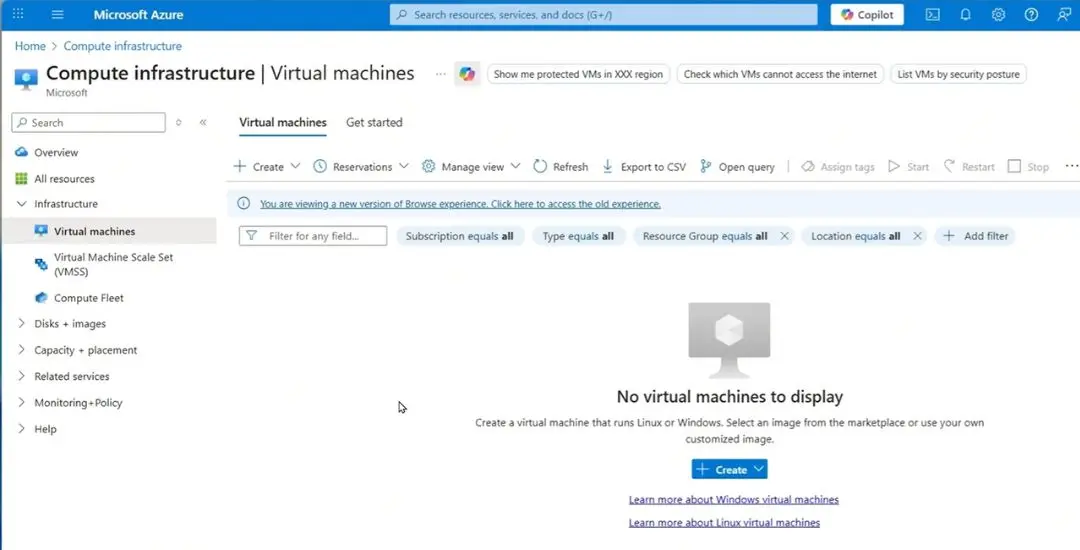
Navigate to Virtual Machines
- From the Azure portal, click “Virtual machines” in the left sidebar or search for it
- Click “Create” → “Azure virtual machine”
Configure Basic Settings
Subscription & Resource Group:
- Subscription: Select your “Free Trial” subscription
- Resource Group: Click “Create new” and name it
n8n-resources
Instance Details:
- Virtual machine name:
n8n-vm(or any name you prefer) - Region: Select closest to you (e.g., UK South, East US)
- Availability options: “No infrastructure redundancy required”
- Security type: “Standard”
- Image: Ubuntu Server 24.04 LTS (or latest LTS)
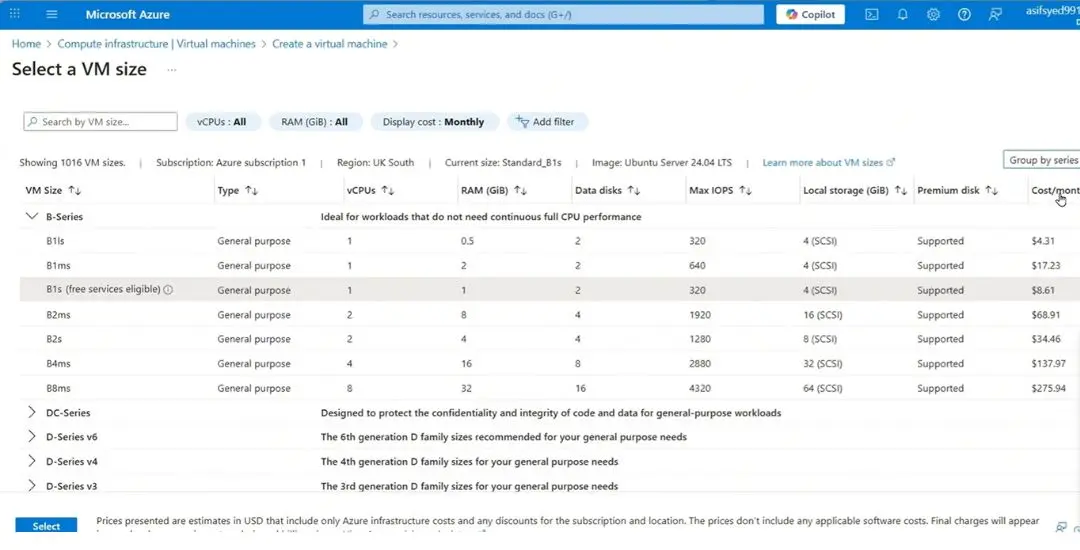
Size – CRITICAL STEP:
- Click “See all sizes”
- Search for and select “Standard_B1s”
- 1 vCPU
- 1 GiB memory
- This is the ONLY size included in the 12-month free tier
Administrator Account:
- Authentication type: Select Password
- Username:
Enter Username - Password:
Enter Secure password
Inbound Port Rules:
- Select “Allow selected ports”
- Check “SSH (22), HTTP(80), HTTPS(443)
Configure Disk Settings
Click “Next: Disks”
CRITICAL – Avoid Charges:
- OS disk type: Change from “Premium SSD” to “Standard SSD (locally-redundant storage)”
- This is FREE in the 12-month tier
- Premium SSD will cost you money
- OS disk size: Leave as default (~30GB)
- Delete with VM: Leave checked
Configure Networking
Click “Next: Networking”
Virtual Network: Create new (default is fine)
Public IP:
- SKU: Standard
- Assignment:Dynamic (this is FREE)
- Static IP costs $3-4/month
- Dynamic IP is fine for our use case
NIC network security group: Basic (default)
Important Note: Your dynamic IP stays the same as long as your VM is running. If you stop/deallocate the VM, the IP may change when you restart it.
Review and Create
- Click through Management, Monitoring, and Advanced tabs (leave as defaults)
- Click “Review + create”
- Azure validates your configuration
- Verify the cost estimate shows free tier services
- Click “Create”
Deployment Complete
Once deployment finishes (1-2 minutes):
- Click “Go to resource, Virtual Machines”
- Note your VM’s Public IP address (you’ll need this shortly)
Step 3: Set Up DNS Records
To access n8n via a domain name (e.g., n8n.yourdomain.com), you need to create a DNS A record.
Why a Subdomain?
Creating a subdomain for n8n keeps it separate from your main website. Your existing site remains completely unaffected.
Create DNS A Record
The process varies by provider, but the concept is the same:
For GoDaddy:
- Log into GoDaddy
- Go to Domain Portfolio → Select your domain
- Click “DNS”
- Click “Add” → Select “A” record
- Fill in:
- Name:
n8n(or your preferred subdomain) - Points to: Your Azure VM’s public IP address
- TTL: 1/2 hour (default)
- Name:
- Click “Save”
For Cloudflare:
- Log into Cloudflare
- Select your domain
- Go to DNS → Records
- Click “Add record”
- Fill in:
- Type: A
- Name:
n8n - IPv4 address: Your Azure VM’s public IP
- Proxy status: DNS only (turn OFF the orange cloud)
- TTL: Auto
- Click “Save”
IMPORTANT for Cloudflare users: Make sure the proxy is OFF (gray cloud, not orange). The orange proxy can interfere with n8n’s webhooks.
DNS Propagation
DNS changes take time to propagate:
- Cloudflare/GoDaddy: Usually 10-15 minutes
- Namecheap/Others: Can take up to 24 hours
Check propagation status:
Visit whatsmydns.net and enter your subdomain (e.g., n8n.yourdomain.com). When you see your Azure IP appearing globally, you’re ready to proceed.
Step 4: Connect to Your VM via SSH
Now let’s connect to your VM to install Docker and n8n.
For Windows Users (PuTTY)
Download PuTTY:
- Search “download PuTTY” or go to chiark.greenend.org.uk/~sgtatham/putty
- Download the 64-bit installer (
putty-64bit-installer.msi) - Run the installer
Connect with PuTTY:
- Open PuTTY
- Enter your VM’s Public IP address in “Host Name”
- Port:
22 - Connection type:
SSH - Accept the security alert (first time only)
- Login: (or your username) & Password
Step 5: Install Docker
Docker will run n8n in an isolated container. Let’s install it step by step.
Update System
First, update your system packages:
sudo apt-get update && sudo apt-get upgrade -y
What this does: Fetches the latest package lists and updates all installed software.
Install Prerequisites
sudo apt-get install -y ca-certificates curl nano
What this does: Installs SSL certificates for secure connections, curl for downloading files, and nano (a text editor).
Set Up Docker’s Repository
Create a directory for Docker’s GPG key:
sudo install -m 0755 -d /etc/apt/keyrings
Download Docker’s GPG key:
sudo curl -fsSL https://download.docker.com/linux/ubuntu/gpg -o /etc/apt/keyrings/docker.asc
Set proper permissions:
sudo chmod a+r /etc/apt/keyrings/docker.asc
Add Docker’s Repository
echo "deb [arch=$(dpkg --print-architecture) signed-by=/etc/apt/keyrings/docker.asc] https://download.docker.com/linux/ubuntu $(. /etc/os-release && echo "${UBUNTU_CODENAME:-$VERSION_CODENAME}") stable" | sudo tee /etc/apt/sources.list.d/docker.list > /dev/null
What this does: Adds Docker’s official repository to your system so you can install Docker packages.
Install Docker
sudo apt-get update && sudo apt-get install -y docker-ce docker-ce-cli containerd.io docker-buildx-plugin docker-compose-plugin
What this does: Installs Docker Engine, CLI tools, container runtime, and Docker Compose.
Verify Installation
sudo docker --version
You should see output like: Docker version 24.0.7, build afdd53b
Perfect! Docker is now installed.
Step 6: Create n8n Configuration
Now let’s set up n8n’s configuration files.
Create Project Directory
mkdir n8n-compose && cd n8n-compose
What this does: Creates a folder called n8n-compose and navigates into it.
Create Environment File
nano .env
This opens the nano text editor. Paste the following configuration:
# ============================================
# n8n CONFIGURATION FILE
# ============================================
# This file contains environment variables for your n8n Docker installation.
# Make sure to update these values to match your specific setup.
#
DOMAIN_NAME=YourDomain.com
SUBDOMAIN=YourSubDomain
GENERIC_TIMEZONE=YourTimeZone(Example:Europe/London)
SSL_EMAIL=YourEmail
#
# ============================================
# NOTES
# ============================================
# After making changes to this file, you'll need to restart your Docker containers
# for the changes to take effect run: "sudo docker compose down && sudo docker compose up -d"
IMPORTANT: Update these values:
DOMAIN_NAME: Your actual domainSUBDOMAIN: Your chosen subdomain (e.g.,n8n)GENERIC_TIMEZONE: Your timezone (find yours here)SSL_EMAIL: Your real email address
Save the file:
- Press
Ctrl+O(write out) - Press
Enter(confirm filename) - Press
Ctrl+X(exit)
Step 7: Create Local Files Directory
This directory allows n8n workflows to read and write files on your server.
mkdir local-files
Verify it was created:
ls -a
You should see .env and local-files in the output.
Why this matters: Files stored here persist across n8n updates, and you can access them in workflows using the /files path.
Step 8: Create Docker Compose File
This is the main configuration file that defines how n8n and Traefik run.
nano docker-compose.yml
Paste the following complete configuration:
services:
  traefik:
    image: "traefik"
    restart: always
    command:
      - "--api=true"
      - "--api.insecure=true"
      - "--providers.docker=true"
      - "--providers.docker.exposedbydefault=false"
      - "--entrypoints.web.address=:80"
      - "--entrypoints.web.http.redirections.entryPoint.to=websecure"
      - "--entrypoints.web.http.redirections.entrypoint.scheme=https"
      - "--entrypoints.websecure.address=:443"
      - "--certificatesresolvers.mytlschallenge.acme.tlschallenge=true"
      - "--certificatesresolvers.mytlschallenge.acme.email=${SSL_EMAIL}"
      - "--certificatesresolvers.mytlschallenge.acme.storage=/letsencrypt/acme.json"
    ports:
      - "80:80"
      - "443:443"
    volumes:
      - traefik_data:/letsencrypt
      - /var/run/docker.sock:/var/run/docker.sock:ro

  n8n:
    image: docker.n8n.io/n8nio/n8n
    restart: always
    ports:
      - "127.0.0.1:5678:5678"
    labels:
      - traefik.enable=true
      - traefik.http.routers.n8n.rule=Host(`${SUBDOMAIN}.${DOMAIN_NAME}`)
      - traefik.http.routers.n8n.tls=true
      - traefik.http.routers.n8n.entrypoints=web,websecure
      - traefik.http.routers.n8n.tls.certresolver=mytlschallenge
      - traefik.http.middlewares.n8n.headers.SSLRedirect=true
      - traefik.http.middlewares.n8n.headers.STSSeconds=315360000
      - traefik.http.middlewares.n8n.headers.browserXSSFilter=true
      - traefik.http.middlewares.n8n.headers.contentTypeNosniff=true
      - traefik.http.middlewares.n8n.headers.forceSTSHeader=true
      - traefik.http.middlewares.n8n.headers.SSLHost=${DOMAIN_NAME}
      - traefik.http.middlewares.n8n.headers.STSIncludeSubdomains=true
      - traefik.http.middlewares.n8n.headers.STSPreload=true
      - traefik.http.routers.n8n.middlewares=n8n@docker
    environment:
      - N8N_HOST=${SUBDOMAIN}.${DOMAIN_NAME}
      - N8N_PORT=5678
      - N8N_PROTOCOL=https
      - NODE_ENV=production
      - WEBHOOK_URL=https://${SUBDOMAIN}.${DOMAIN_NAME}/
      - GENERIC_TIMEZONE=${GENERIC_TIMEZONE}
    volumes:
      - n8n_data:/home/node/.n8n
      - ./local-files:/files

volumes:
  n8n_data:
  traefik_data:
What this configuration does:
Traefik Service:
- Automatically obtains and renews SSL certificates from Let’s Encrypt
- Redirects all HTTP traffic to HTTPS
- Acts as a reverse proxy to route traffic to n8n
n8n Service:
- Runs the latest n8n version
- Accessible via your custom domain
- Includes security headers (HSTS, XSS protection, etc.)
- Mounts persistent volumes for data storage
Volumes:
n8n_data: Stores workflows, credentials, and n8n’s internal databasetraefik_data: Stores SSL certificates./local-files: Your file storage accessible at/filesin n8n
Save the file:
- Press
Ctrl+O - Press
Enter - Press
Ctrl+X
Step 9: Launch n8n
Everything is configured! Let’s start n8n.
sudo docker compose up -d
What this does:
- The
upcommand starts all services defined in docker-compose.yml - The
-dflag runs them in detached mode (background)
Docker will:
- Download the Traefik image
- Download the n8n image
- Create the volumes
- Start both containers
This takes 1-2 minutes on first run.
Check Status
sudo docker compose ps
You should see both traefik and n8n with status “Up”.
Access n8n
Open your browser and navigate to your n8n URL:
https://n8n.yourdomain.com

First visit: You’ll see the n8n setup wizard. Create your owner account:
- Email address
- First name
- Last name
- Password
Congratulations! Your n8n instance is now live with automatic HTTPS!
Update n8n Without Losing Workflows or Data
Updating n8n regularly ensures your self-hosted instance remains secure, stable, and compatible with modern integrations. Each update typically includes security patches that protect against vulnerabilities, bug fixes that resolve workflow execution issues, and new nodes or features that expand automation possibilities.
Step-by-Step n8n Update Process
Step 1: Update system packages
Before updating n8n, first update your Ubuntu system:
sudo apt-get update && sudo apt-get upgrade -y
Step 2: Navigate to n8n directory
cd n8n-compose
Step 3: Pull latest images
sudo docker compose pull
This downloads the newest versions of n8n and Traefik without starting them yet.
Step 4: Restart with updates
sudo docker compose down && sudo docker compose up -d
What happens:
docker compose down: Stops and removes containersdocker compose up -d: Starts new containers with updated images- Your data remains safe in Docker volumes
Downtime: Your n8n instance will be offline for 30-60 seconds during the update.
n8n Update Best Practices
Before updating:
- Export your workflows as backup (Workflows → Select All → Export)
- Perform updates during low-traffic periods
Update frequency:
- Check for updates monthly
- Subscribe to n8n release notes
Essential Docker Commands for n8n Maintenance
Check n8n Status
cd n8n-compose
sudo docker compose ps
View n8n Logs
cd n8n-compose
sudo docker compose logs n8n
Stop n8n
cd n8n-compose
sudo docker compose stop
Start n8n
cd n8n-compose
sudo docker compose start
Restart n8n
cd n8n-compose
sudo docker compose restart
Troubleshooting Self-hosted n8n instance
Can’t Access n8n via Domain
Check DNS propagation:
- Visit whatsmydns.net
- Enter your subdomain
- Verify it shows your Azure VM IP globally
Check if n8n is running:
sudo docker compose ps
Both services should show “Up”
Check logs for errors:
sudo docker compose logs
SSL Certificate Issues
Let’s Encrypt rate limits:
- You’re limited to 5 certificates per domain per week
- If you hit the limit, wait 7 days or use a different subdomain
Check Traefik logs:
sudo docker compose logs traefik
If you’re seeing an SSL error after deploying n8n, it likely means the certificate wasn’t successfully issued. This usually happens if DNS wasn’t fully propagated or there was an issue during the initial request. A quick fix is to delete the existing certificate data and re-request a new one:
# Step 1: Stop the running containers
sudo docker compose down
# Step 2: Remove the old certificate file
sudo rm -rf ./letsencrypt/acme.json
# Step 3: Start the containers again to trigger a fresh certificate request
sudo docker compose up -d
VM is Out of Memory
The B1s VM has only 1GB RAM. If you’re running complex workflows:
Check memory usage:
free -h
Solutions:
- Optimize your workflows
- Reduce concurrent executions in n8n settings
- Upgrade to a larger VM size (will cost money)
n8n self-hosting Cost Breakdown
Free for 12 Months
- VM (B1s): $0 (750 hours/month free)
- Disk (Standard SSD): $0 (64GB P6 SSD free)
- Public IP (Dynamic): $0 (included)
- Bandwidth: $0 (15GB/month free)
- Network Security Group: $0 (always free)
Total: $0/month for first 12 months
After 12 Months
Once your free tier expires:
- VM (B1s): ~$7.60/month
- Disk (30GB Standard SSD): ~$1.15/month
- Public IP (Dynamic): $0 (free while VM is running)
- Bandwidth: $0 (first 5GB), then ~$0.087/GB
Estimated total: ~$8.75/month after free tier
Want to keep it free longer?
- Create a new Azure account with a different email
- Export your workflows and credentials
- Set up on the new account (you get another 12 months free)
Start Building Workflows After You Self-Host n8n on Azure
Congratulations! You’ve successfully deployed a production-ready n8n instance on Microsoft Azure that’s completely free for 12 months, with automatic HTTPS via Let’s Encrypt, custom domain access, persistent data storage, and a professional reverse proxy setup that takes just 30 minutes to configure.
This self-hosted n8n deployment on Azure is perfect for learning workflow automation, running personal projects, powering small business workflows, and prototyping automation ideas without monthly subscription costs
While this guide helps you set up the technical infrastructure, designing custom AI-powered automation solutions and scaling workflows across your business requires strategic expertise. If you need help with advanced n8n workflows, AI agent integrations, or enterprise automation strategy, book a free discovery call. We specialize in helping SMEs leverage intelligent automation to work smarter and transform their operations